BRONSUN EYEBROW PROTECTOR - Beautifeau

Complete your treatment products with

BRONSUN EYEBROW PROTECTOR


Professional Skin & Hair Protection During Brow Treatments

The Bronsun Eyebrow Protector is a professional-grade cream designed to saf

In stock


Professional Skin & Hair Protection During Brow Treatments

The Bronsun Eyebrow Protector is a professional-grade cream designed to saf

Shipping en returns

  • Product Name: Bronsun Eyebrow Protector
  • Purpose: Creates a protective barrier for the skin during eyebrow lamination and bleaching.
  • Key Benefits:
    • Shields skin from chemical agents to prevent irritation and dryness.
    • Nourishes and protects both skin and brow hairs.
    • Soft, flexible texture for easy application with a brush.
    • Enriched with argan oil and shea butter for intense moisture and care.
  • Texture: Cream with a smooth, pliable consistency for precise application.
  • Suitable For: Use on skin around the eyebrows and directly on brow hairs.
  • Professional Use: Specifically formulated for professional eyebrow treatments.
  • Volume: 10 g
  • For Professional Use Only
  1. Before the Procedure – Apply the required amount of Bronsun Eyebrow Protector to the skin around the eyebrows, carefully avoiding the areas you intend to bleach or laminate. Ensure an even, protective layer to fully shield the skin from contact with chemical agents.
  2. During the Procedure – Keep the cream in place as a barrier while the bleaching or lamination products are applied to the brows. Its flexible texture allows comfortable wear without interfering with the treatment process.
  3. After the Procedure – Once the treatment is complete, apply a small amount of the cream around the eyebrows and gently massage until fully absorbed. This helps restore hydration, reduce dryness, and maintain skin comfort.
  4. Extra Care for Brows – You may also apply the product directly to the eyebrow hairs to help prevent brittleness and dehydration, keeping them soft, healthy, and well-nourished.

Professional Tip: For best results, always use the Bronsun Eyebrow Protector as part of your pre- and post-treatment routine to enhance client comfort and protect delicate skin.

Enriched with Argania Spinosa Kernel Oil (Argan Oil) and Butyrospermum Parkii (Shea Butter) for intense moisture and care.

Details

The Brow Code Mapping Thread 30m is a must-have tool for professionals seeking precision and consistency in brow design. Infused with activated charcoal and pre-inked for convenience, this thread delivers bold, smudge-free lines that make brow mapping fast, clean, and accurate.

At just 1mm thick, the ultra-fine thread allows for sharp, high-contrast markings without staining the skin. Whether you’re mapping brows for waxing, tinting, henna, or lamination, this tool enhances symmetry, streamlines workflow, and supports flawless brow shaping every time.

Now available in both black and white, the thread adapts to all skin tones and offers maximum visibility during application.

How to Use

Achieve perfectly mapped, symmetrical brows using the Brow Code Mapping Thread 30m by following these step-by-step instructions:

Step 1: Prep the Brows

Before starting, perform a patch test at least 24 hours in advance.
Cleanse the brow area thoroughly using an oil-free, professional-grade cleanser to remove any makeup, oils, or skincare residue. Gently pat the area dry with a clean cotton pad. The skin should be dry, clean, and product-free for optimal thread adherence.

Step 2: Mark Key Mapping Points

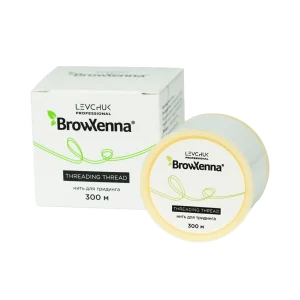
Cut a small section of your Charcoal Mapping Thread—choose black or white depending on the client’s skin tone for better visibility.

Use the nose as your central guide and mark the four key brow points:

  • Center: Align the thread with the center of the nose to mark the midpoint between both brows.
  • Head: Run a vertical line from the nose’s dimple straight up to determine where each brow should begin.
  • Arch: Find the highest point of the brow by aligning from the nose’s outer edge through the center of the pupil.
  • Tail: Extend a line from the outer nose through the outer eye corner to identify where the brow should end.

Step 3: Outline the Shape

Now connect the key points using the mapping thread to create a clean outline:

  • Base Line: Draw a horizontal line beneath the brow head to mark the lowest point.
  • Top Line: Repeat above the brow head to determine the highest point.
  • Peak Line: Draw across the top of the arch to refine height.
  • Lower Brow Line: Extend from the brow base through the arch on both sides.
  • Upper Brow Line: Connect the opposite base and peak to define the top brow edges.
  • Tail Taper: Connect the arch to the tail point along both upper and lower edges.

Step 4: Assess and Refine

Step back and evaluate the mapped brows for symmetry, balance, and proportion. Adjust any lines for precision before you begin shaping.

Step 5: Shape the Brows

Now shape the brows using your preferred method—waxing, tweezing, or trimming:

  • Trim: Brush brow hairs into their natural direction. Using Trimming Scissors, remove only the hairs outside the mapped lines. Never trim by brushing hairs up or down.
  • Wax: Apply wax precisely outside the mapped lines and remove excess hair.
  • Tweeze: Use Slant Tweezers to clean up any remaining stray hairs for a refined finish.

Step 6: Final Touch

After shaping, gently wipe away any leftover pigment with a damp cotton round. Apply a soothing aftercare product to calm the skin and lock in hydration post-treatment.

Ingredients

Complete your treatment products with

Search