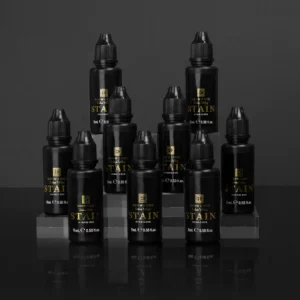
MAST PRO NEEDLES AREOLA AND SCAR CAMOUFLAGE - Beautifeau

Complete your treatment products with

MAST PRO NEEDLES AREOLA AND SCAR CAMOUFLAGE


MAST PRO Needles – Precision, Stability, and Performance

For permanent makeup artists seeking flawless precision and high stability


MAST PRO Needles – Precision, Stability, and Performance

For permanent makeup artists seeking flawless precision and high stability

Shipping en returns

Achieve flawless PMU results with MAST PRO PMU Needles, designed for precision, smooth pigment flow, and minimal skin trauma. Follow these steps for optimal application:


  1. Choose the Right Needle for Your Technique
  • 3P / 0.18 (0403RL) – A 3 Round Liner (3RL) with 0.18mm ultra-fine needles, perfect for soft shading and natural hairstrokes. This is a preferred choice for traumatized skin and lip treatments.
  • 1P / 0.25 (0801RL) – A 1 Round Liner (1RL) with 0.25mm diameter, ideal for delicate eyeliner work and precise detailing. This needle is best suited for mature and thin skin, often used for precise and detailed work.
  • 1P / 0.30 (1001RL) – A 1 Round Liner (1RL) with 0.30mm thickness, great for defined lip contouring and crisp brow outlines. This is the most universal needle, making it a go-to option for many PMU procedures.
  • 3P / 0.30 (1003RL) – A 3 Round Liner (3RL) with 0.30mm diameter, best for filling in brows, lip blush, and soft shading. This needle is especially useful for Infralash applications.
  • 1P / 0.35 (1201RL) – A 1 Round Liner (1RL) with 0.35mm width, providing deeper pigment implantation for bold, long-lasting color. Commonly used by Eastern European artists, this needle is also suitable for hairstrokes.


2. Insert and Adjust the Needle

  • Securely attach the needle to your PMU machine for stability and precision.
  • Adjust depth and speed depending on the treatment:
    • Light strokes and shading – Use shallower depth and slower speed.
    • Bold outlines and deep saturation – Increase depth and maintain steady pressure.


3. Apply with Control and Consistency

  • Work in light layers to ensure even pigment saturation.
  • Maintain consistent pressure to prevent patchy color application.


4. Maintain Hygiene and Needle Safety

  • MAST PRO needles are single-use and EO gas sterilized for maximum hygiene.
  • Dispose of used cartridges immediately after each session to prevent contamination.


Upgrade your PMU technique with MAST PRO Needles, trusted for precision, durability, and flawless results.

Details

Treatment Type: At-home brow lamination

Kit Duration: Up to 5 full applications

Processing Time: 4–7 minutes per step (based on hair thickness)

Results Duration: Lasts up to 8 weeks

Skill Level: Suitable for beginners and professionals

Formulation: Dermatologist-tested, gentle on skin and hair

Wrap Compatibility: Works with Brow Code Sculpt & Set Reusable Brow Wrap or other brow wrap options

Scent: Subtle, salon-quality fragrance

Vegan & Cruelty-Free: Yes

Storage: Store in a cool, dry place. Reseal tightly after use to maintain product integrity.

How to Use


Step 1: Prep and Apply Restructuring Bond Solution

  • Begin with a patch test before full application.
  • Cleanse the brow area using an oil-free foaming cleanser. Rinse with a damp cotton pad.
  • Make sure brows are completely dry and free of oils before proceeding.

Apply a pea-sized amount of the Step 1 Restructuring Bond Solution to both brows using a cotton tip.
Brush the brow hairs into your desired shape and direction.

Cover the brows with the Brow Code Sculpt & Set Reusable Brow Wrap or a brow wrap of your choice.

Leave on for the following time, depending on hair type:

  • Very fine brows: 4–5 minutes
  • Normal brows: 5–6 minutes
  • Thick/coarse brows: 6–7 minutes

Remove the wrap and wipe away the product using a dry cotton swab or pad.


Step 2: Apply Neutralising Setting Solution

Using a clean cotton tip, apply a pea-sized amount of the Step 2 Neutralising Setting Solution to both brows.

Brush hairs again into the desired position, then cover with the reusable Brow Wrap.

Leave on for the same processing time as Step 1:

  • Very fine brows: 4–5 minutes
  • Normal brows: 5–6 minutes
  • Thick/coarse brows: 6–7 minutes

Remove the wrap and wipe away the product with a dry cotton swab or pad.

Important: Rinse the wrap thoroughly between steps to prevent formula interaction.


Step 3: Apply Leave-In Restorative Mask

Apply a pea-sized amount of the Step 3 Leave-In Restorative Mask to both brows.

Gently brush the product through with a spoolie to evenly coat each hair.

Do not rinse off—let the mask absorb into the brows for continued nourishment and hydration.

Finish by styling the brows with a clean spoolie brush.

Ingredients


Key Ingredients

  • Cysteamine – Gently restructures brow hairs while minimizing damage and enhancing natural shine for a healthy, polished look.
  • Argan Oil – Helps strengthen the skin’s barrier and improves moisture retention in brow hairs, promoting softness and flexibility.
  • Castor Seed Oil – Widely known for stimulating hair growth and improving the overall condition of both hair and skin.
  • Jojoba Oil – Deeply hydrating and nourishing, this oil supports strong, healthy brows by delivering essential moisture.
  • Hyaluronic Acid – A powerful humectant that hydrates, plumps, and protects the hair while adding smoothness and volume.
  • Algae Extract – Rich in antioxidants, this marine ingredient boosts hydration and supports natural collagen production.
  • Vitamin B5 (Panthenol) – A moisture-binding agent that draws water into the hair and skin, locking it in and reinforcing the protective barrier.
  • Vitamin E – A natural antioxidant that helps support healthy hair growth and protects the skin from environmental stressors.

Complete your treatment products with

Our Bestsellers

Search