THUYA BROW LAMINATION AKA LIFT MINI KIT FOR 6 TREATMENTS - Beautifeau

Complete your treatment products with

THUYA BROW LAMINATION AKA LIFT MINI KIT FOR 6 TREATMENTS

The Perfect Starter Kit for Professional Results

Looking to offer brow lamination in your salon or studio? The Thuya’s Brow Lamination aka L

The Perfect Starter Kit for Professional Results

Looking to offer brow lamination in your salon or studio? The Thuya’s Brow Lamination aka L

Shipping en returns

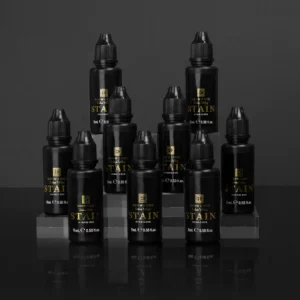
The first crucial step in the Brow Lamination or Brow Lift treatment is the Brow Pre-Smoothing. This liquid was already vegan & is specially formulated to prepare the eyebrows and soften any unruly and rebellious hairs. By doing so, it simplifies the lifting and perming procedures, resulting in a shorter processing time, preserving healthy and easy brow hairs, and improving the Brow Lamination or Lift outcomes.


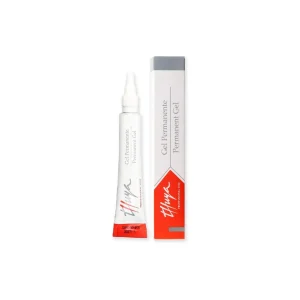
The Thuya Permanent Gel is a new addition to the brow and lash lifting products. This gel effectively opens up the hair cuticles, allowing for easy modification of hair structure during lifting and perming services.


The Neutralizer Cream is a safe and easy-to-apply cream used in the brow and lash lifting process. Its creamy texture prevents any leakage and allows for better control during application. The white color of the cream also enables better application control.


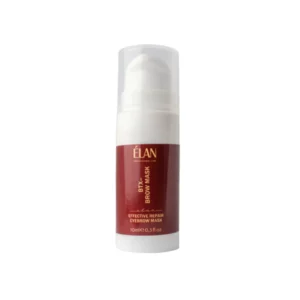
The Regenerating Cream is the final step in the lamination process. It naturally hydrates, strengthens and repairs eyelashes, promoting natural renewal.


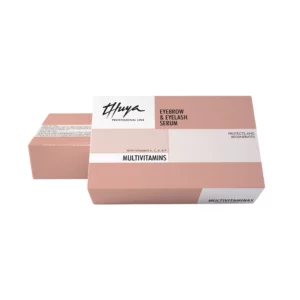
One Kit delivers around 6 treatments.

Only for Professional use.

  1. For Brow Lamination aka Brow Lift treatment, start by removing any makeup in the eyebrow area with Thuya Water-based Eye Make-up Remover BI-Phase. Then or if there’s no makeup, use Thuya Water-based Eye Make-up Remover to cleanse the area. Next, comb the eyebrows using a Comb Brush.
  2. Apply the Eyebrow Pre-Smoothing using a Lipgloss Brush and let it sit for 2-5 minutes. Then, remove the Pre-Smoothing product with a dry cotton pad.
  3. Using a flat makeup brush or Lipgloss Brush, apply the Perming Gel to the eyebrows. Brush the hair in the correct direction using a Mascara wand or Interdental Brush, and cover the area with an osmotic film. Processing time is 8-15 minutes.
  4. Every 2-3 minutes during the exposure time, remove the osmotic film, brush the brow hairs again, and make sure they are well-ordered before covering them again. Repeat this step two more times to achieve a satisfactory result.
  5. After the exposure time, remove the perm gel with a dry cotton swab. Then, apply the Neutralizer with a flat makeup brush or Lipgloss Brush, and cover the area with the osmotic film again. Leave it on for the same amount of time as the Thuya Permanent Gel.
  6. Once the exposure time is up, remove the Neutralizer with a cotton pad moistened with water.
  7. After completing the Brow Perm treatment, you have the option to perform eyebrow shaping, sculpting, and tinting.
  8. Finish the process by combing the area with Thuya Regenerating Cream.
Details

The Brow Code Mapping Thread 30m is a must-have tool for professionals seeking precision and consistency in brow design. Infused with activated charcoal and pre-inked for convenience, this thread delivers bold, smudge-free lines that make brow mapping fast, clean, and accurate.

At just 1mm thick, the ultra-fine thread allows for sharp, high-contrast markings without staining the skin. Whether you’re mapping brows for waxing, tinting, henna, or lamination, this tool enhances symmetry, streamlines workflow, and supports flawless brow shaping every time.

Now available in both black and white, the thread adapts to all skin tones and offers maximum visibility during application.

How to Use

Achieve perfectly mapped, symmetrical brows using the Brow Code Mapping Thread 30m by following these step-by-step instructions:

Step 1: Prep the Brows

Before starting, perform a patch test at least 24 hours in advance.
Cleanse the brow area thoroughly using an oil-free, professional-grade cleanser to remove any makeup, oils, or skincare residue. Gently pat the area dry with a clean cotton pad. The skin should be dry, clean, and product-free for optimal thread adherence.

Step 2: Mark Key Mapping Points

Cut a small section of your Charcoal Mapping Thread—choose black or white depending on the client’s skin tone for better visibility.

Use the nose as your central guide and mark the four key brow points:

  • Center: Align the thread with the center of the nose to mark the midpoint between both brows.
  • Head: Run a vertical line from the nose’s dimple straight up to determine where each brow should begin.
  • Arch: Find the highest point of the brow by aligning from the nose’s outer edge through the center of the pupil.
  • Tail: Extend a line from the outer nose through the outer eye corner to identify where the brow should end.

Step 3: Outline the Shape

Now connect the key points using the mapping thread to create a clean outline:

  • Base Line: Draw a horizontal line beneath the brow head to mark the lowest point.
  • Top Line: Repeat above the brow head to determine the highest point.
  • Peak Line: Draw across the top of the arch to refine height.
  • Lower Brow Line: Extend from the brow base through the arch on both sides.
  • Upper Brow Line: Connect the opposite base and peak to define the top brow edges.
  • Tail Taper: Connect the arch to the tail point along both upper and lower edges.

Step 4: Assess and Refine

Step back and evaluate the mapped brows for symmetry, balance, and proportion. Adjust any lines for precision before you begin shaping.

Step 5: Shape the Brows

Now shape the brows using your preferred method—waxing, tweezing, or trimming:

  • Trim: Brush brow hairs into their natural direction. Using Trimming Scissors, remove only the hairs outside the mapped lines. Never trim by brushing hairs up or down.
  • Wax: Apply wax precisely outside the mapped lines and remove excess hair.
  • Tweeze: Use Slant Tweezers to clean up any remaining stray hairs for a refined finish.

Step 6: Final Touch

After shaping, gently wipe away any leftover pigment with a damp cotton round. Apply a soothing aftercare product to calm the skin and lock in hydration post-treatment.

Ingredients

Complete your treatment products with

Our Bestsellers

Search