THUYA BROW LAMINATION KIT SACHETS - Beautifeau
Sale!

Complete your treatment products with

THUYA BROW LAMINATION KIT SACHETS


Elevate your brow and lash services with the Thuya Brow Lamination Kit Sachets, a professional-grade 3-step system designed for precision, performance, and care. Thi

In stock


Elevate your brow and lash services with the Thuya Brow Lamination Kit Sachets, a professional-grade 3-step system designed for precision, performance, and care. Thi

Shipping en returns

The Thuya Brow Lamination Kit Sachets offer a complete 3-step professional solution for brow styling, reshaping, and aftercare. Each kit includes individually sealed sachets for optimal freshness, hygiene, and portion control—perfect for salons, brow bars, or mobile beauty professionals.

Inside the kit:

  • 12 x Permanent Gel Sachets (3ml each) – Opens the hair cuticle to restructure and prepare the brows for lifting
  • 12 x Neutralizer Cream Sachets (3ml each) – Sets the new shape in place with a creamy, non-drip formula for easy application
  • 12 x Regenerating Cream Sachets (3ml each) – Nourishes, hydrates, and strengthens the brow hairs post-treatment with Argan Oil and Vitamin E

Designed for use on all brow types, the kit allows brow artists to deliver consistent, long-lasting results while supporting hair health. The sachet format makes this kit especially convenient for back-to-back appointments, training sessions, or travel kits.

For professional use only.

Brow Lamination Steps

Step 1: Permanent Gel (Step 1)
Apply the Permanent Gel evenly across the brow hairs from root to tip. Cover with cling film to retain heat.

  • Thin hair: 7–9 minutes
  • Medium hair: 9–12 minutes
  • Thick/coarse hair: Up to 15 minutes

Check development after 5 minutes. Once processing is complete, remove the product with a dry cotton pad.

Step 2: Neutralizer Cream (Step 2)
Apply the Neutralizer Cream for the same duration as the Permanent Gel. While processing, brush brow hairs into the desired shape and cover with cling film.
After time is complete, remove with a damp cotton pad, then dry with a clean cotton round. At this stage, you may proceed with brow tinting and waxing.

Step 3: Regenerating Cream (Step 3)
Apply a small amount of Regenerating Cream using a lip wand or microbrush. Instruct clients not to wet the brows for 24 hours post-treatment. Advise avoiding steam, saunas, or direct heat.
Tip: Retail this cream as aftercare to boost results and nourish brows daily.

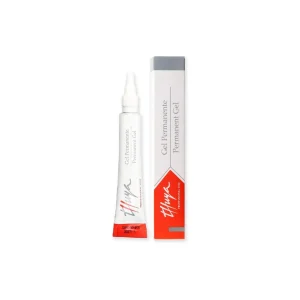
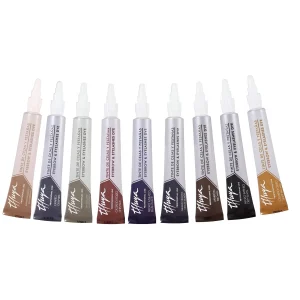
Permanent Gel (Step 1):
Aqua (Water), Ammonium Thioglycolate, Ammonium Bicarbonate, Ammonium Acryloyldimethyltaurate/VP Copolymer, Dipropylene Glycol, Hydrolyzed Collagen, Ammonia, Ethanolamine, Disodium EDTA, Boswellia Serrata Gum, Sodium Hydrosulfite, Phenoxyethanol, Sodium Hydroxide, Benzoic Acid, Sodium Benzoate.

Neutralizer Cream (Step 2):
Aqua (Water), Cetearyl Alcohol, Stearyl Alcohol, Cetyl Alcohol, Hydrogen Peroxide, Ceteareth-33, Aminotrimethylene Phosphonic Acid, Sodium Stannate, Phosphoric Acid.

Note: Always perform a patch test before use. For professional use only.

Details

Product Name: Naturaverde Sensitive Zinc Oxide Soft Wax – 397GR
Formula Type: Strip wax (soft wax)
Key Ingredient: Zinc Oxide – known for calming and protecting sensitive, acne-prone skin
Hair Type: Fine to medium hair
Skin Type: Sensitive, dry, or blemish-prone skin
Texture: Smooth and creamy for even application
Use With: Non-woven or muslin epilating strips
Recommended Areas: Face, underarms, bikini line, and other delicate areas
Melting Point: Low – melts quickly for easy, consistent use
Origin: Made in Italy
Dermatologist Tested: Yes
Volume: 397 grams
Professional Use: Ideal for both salon professionals and at-home waxing enthusiasts

How to Use

  1. Preparation:
    • Remove the plastic lid from the wax can.
    • Slide the protective collar onto the can.
    • Place the wax can in the wax warmer.
    • Heat the wax until it reaches a thin, syrup-like consistency.
  2. Testing the Wax:
    • To test the wax temperature, dip an applicator into the wax.
    • The wax should stick to the applicator and drip slowly.
    • If the wax runs off the applicator, it is too hot and should cool slightly before use.
  3. Application:
    • After cleansing and drying the skin, use a disposable wooden applicator to apply a thin layer of wax to the skin in the direction of hair growth.
  4. Using Epilating Strips:
    • Place an epilating strip over the applied wax.
    • Stroke the cloth in the direction of hair growth to ensure it adheres well.
  5. Hair Removal:
    • Hold the skin taut with one hand.
    • Quickly pull the epilating strip in the opposite direction of hair growth, keeping it close to the skin.
    • Never re-apply wax to the same area during the session.
  6. Post-Wax Care:
    • Once waxing is complete, apply Nourish Post-Treatment Oil to remove any wax residue.
    • Follow up with Soothe After-Wax Lotion to soothe and moisturize the skin.


Ensure the wax temperature is suitable to avoid burns. Always perform a patch test before using the wax extensively.

Ingredients

Glyceryl Rosinate, Mineral Oil/ Paraffinum Liquidum / Huile Minerale, Zinc Oxide, Titanium Dioxide (CI 77891), Mica

Complete your treatment products with

Our Bestsellers

Search